
Ring Doorbell Pro Installation
/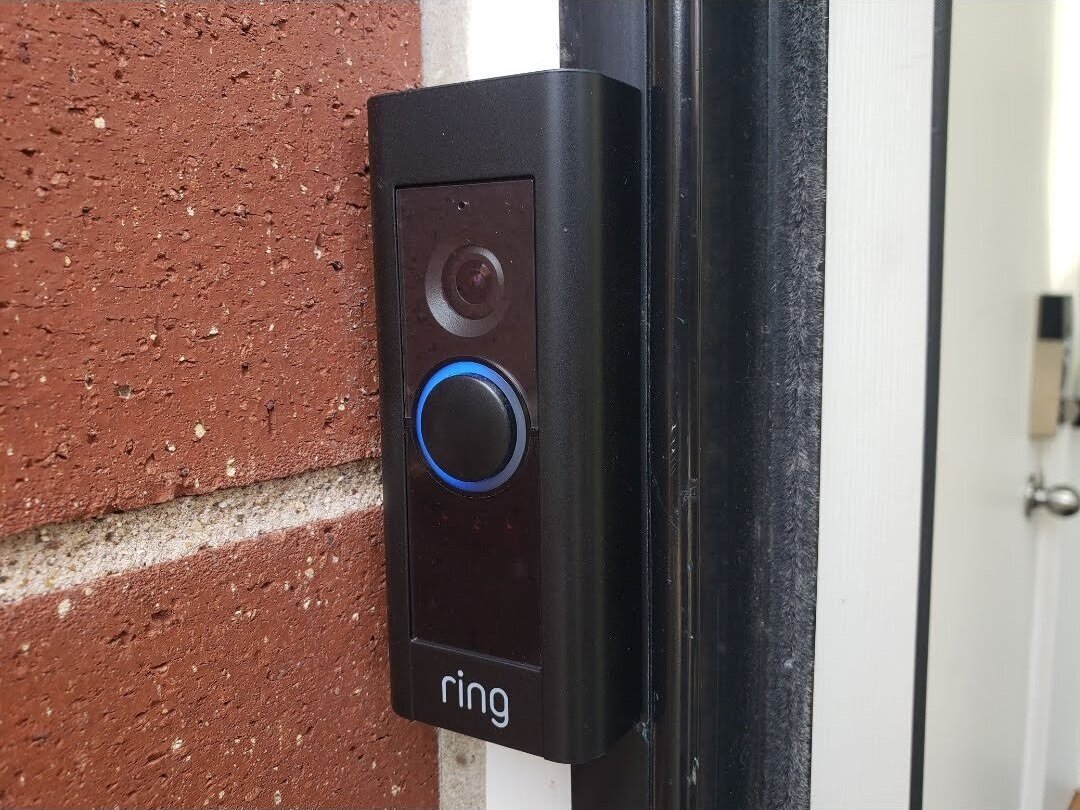
Ring Pro Doorbell installed With Black Cover Plate
In the post below we cover how to install the Ring Pro Doorbell in step by step instructions below but we also provide you with solutions to common troubleshooting issues with the Ring Doorbell Pro. If you’ve already gotten started with installing your Ring Doorbell Pro and gotten stuck you can click links to our resources below.
Ring Doorbell Pro Installation Resources:
How To Find My Doorbell Transformer
Hardwired Transformers That Work With Ring Pro
Plug In Transformers That Work With Ring
How To Install Ring Doorbell Pro
Step #1: Check Ring Doorbell Pro Compatibility (optional)
Before you get started it’s best to check your existing doorbell transformer voltage to make sure you have enough power for the Ring Doorbell Pro. We teach you how to check your doorbell voltage in this post.
You don’t have to check the voltage but I can be helpful to determine if the Ring 2 Doorbell might be a better fit or if you will need to upgrade your transformer for the Ring Pro Doorbell. If you’re voltage is less than 16V you should install either this 16V - 30VA hardwired transformer or plug in transformer for your Ring Doorbell. The Ring 2 Doorbell is also an option as it only requires 10V or can be battery powered.
Related Post: Best Battery Powered Video Doorbells
Step #2: Download The Ring App and Set up an account
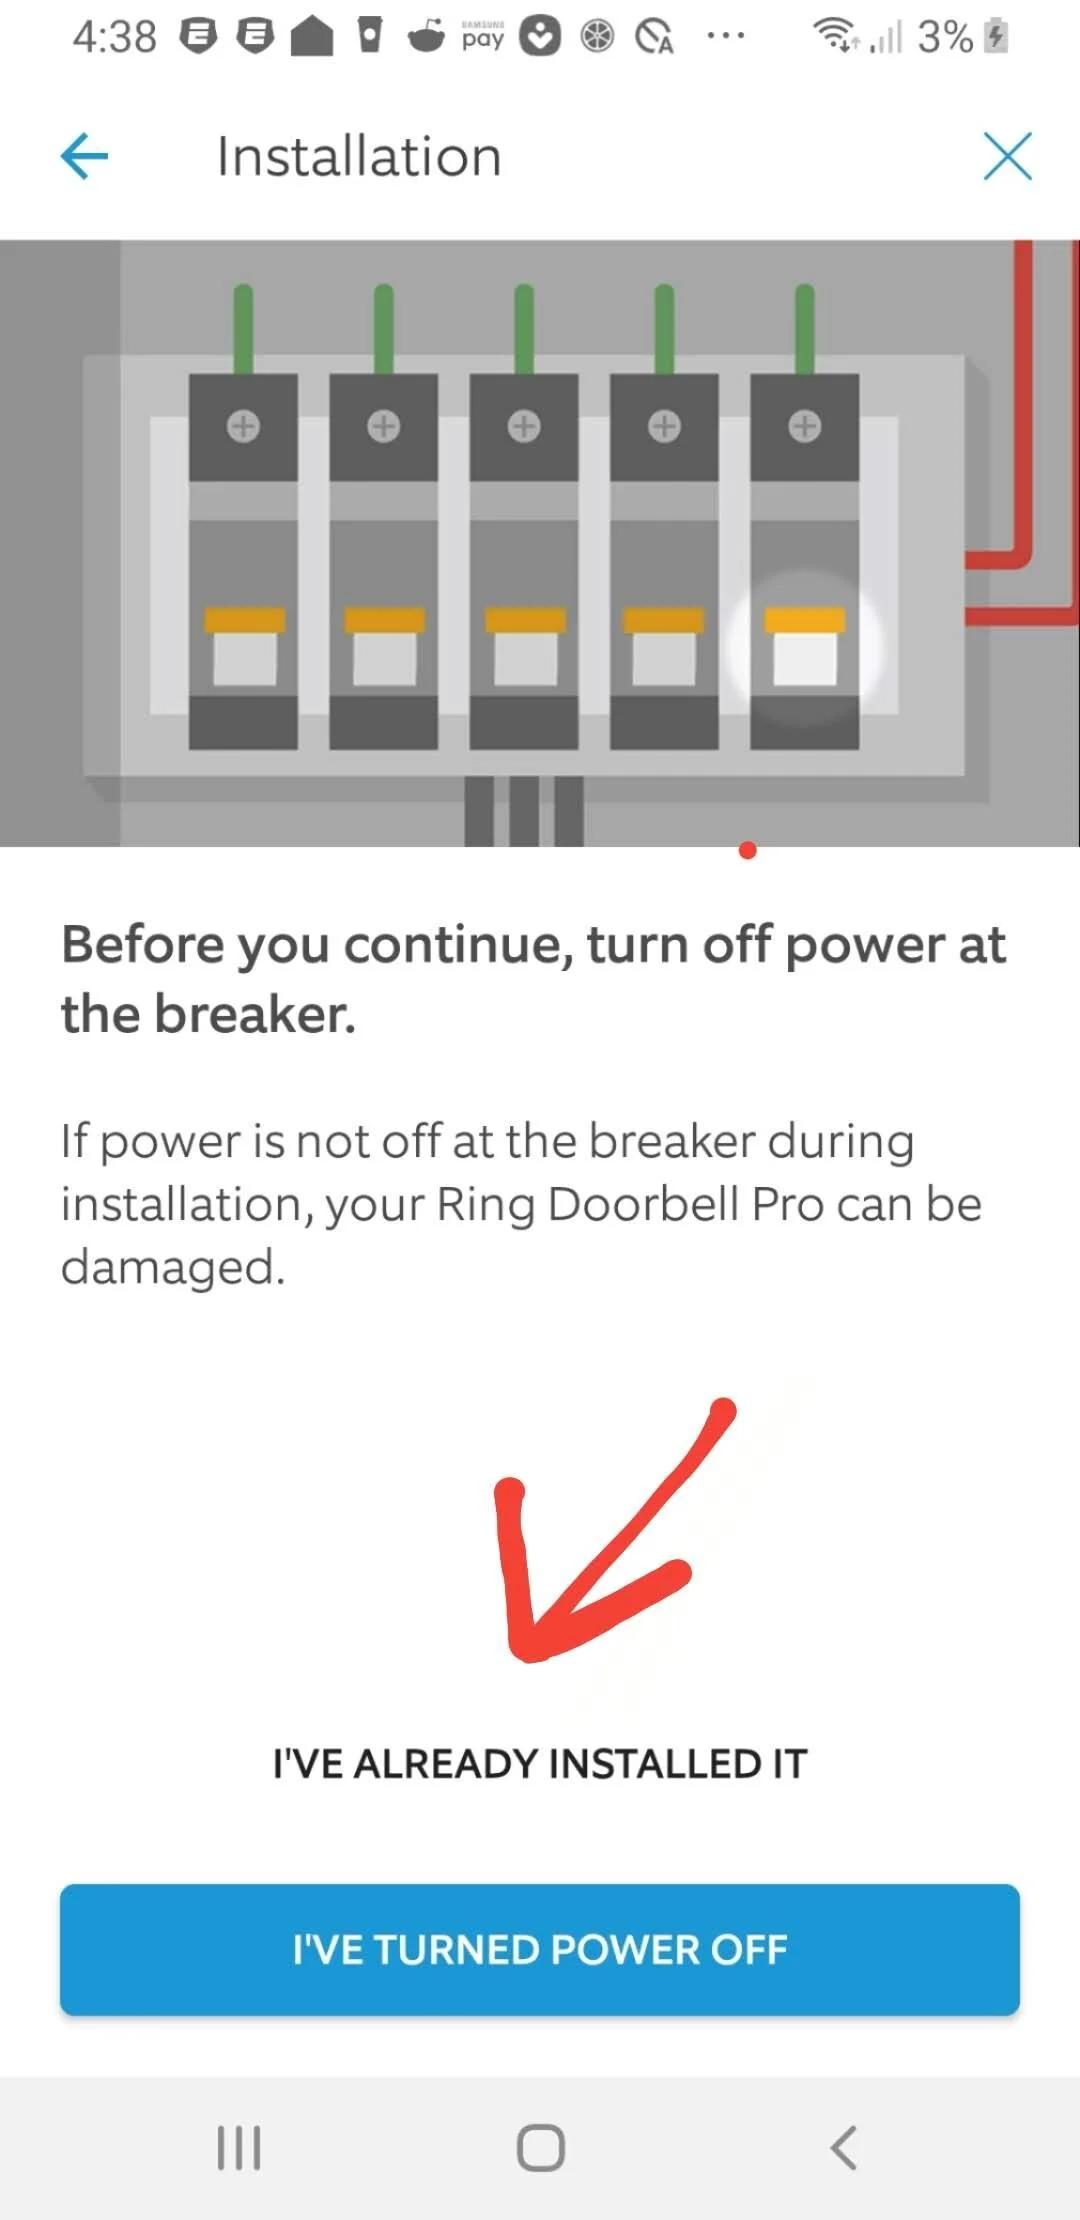
Step #3: Turn off the power to your doorbell by shutting off the circuit breaker. If you don’t know which circuit your doorbell is on you can shut down the full panel.
Step #4: With the power off remove the existing doorbell, by unscrewing it and removing the wires from the back of the doorbell.

Remove the existing doorbell and expose the wires for the Ring Doorbell Pro Installation
Step #5: Loosen the screws on the back of the Ring Pro Doorbell and install the new wires on the screw terminals on the back of the Ring Pro.
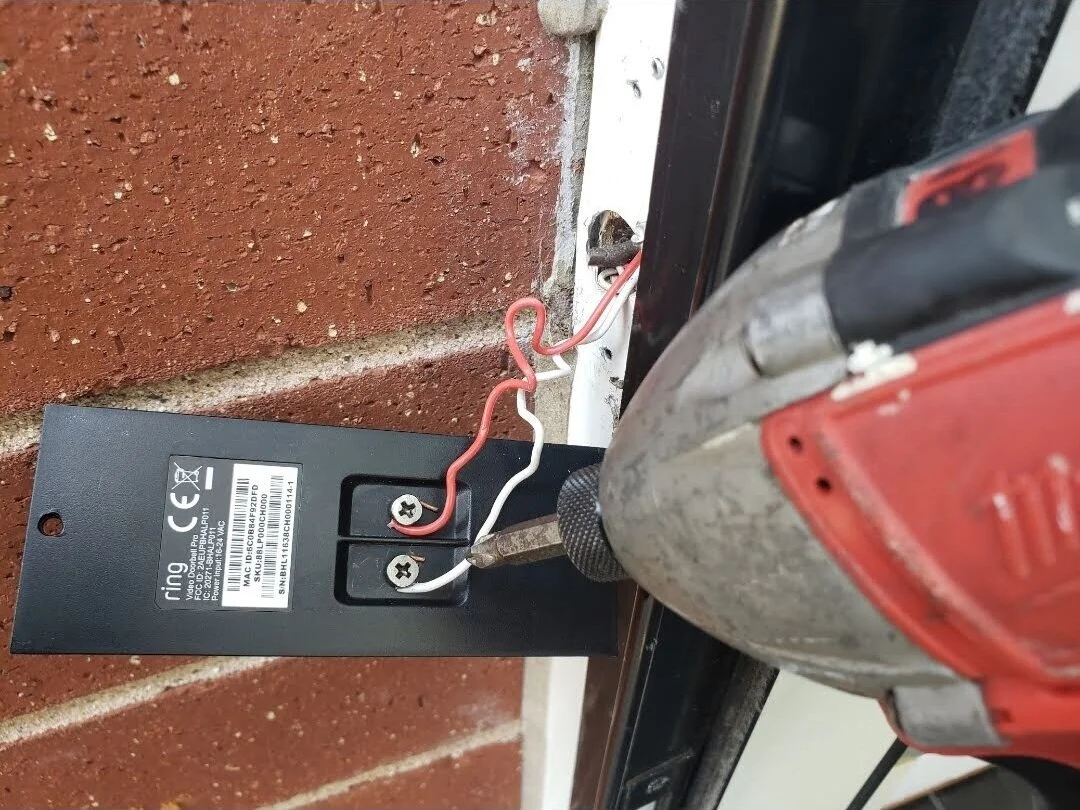
Secure the doorbell wires to the Ring Doorbell Pro
Step #6 With the doorbell wires secured you can now install the Ring Doorbell Pro on to the wall. Push the wires back into the hole behind the doorbell if needed and and then use the two provided screws to install the Ring doorbell on to the wall. I typically install that top screw first on the ring pro then make sure I have the doorbell level and then install the bottom screw.
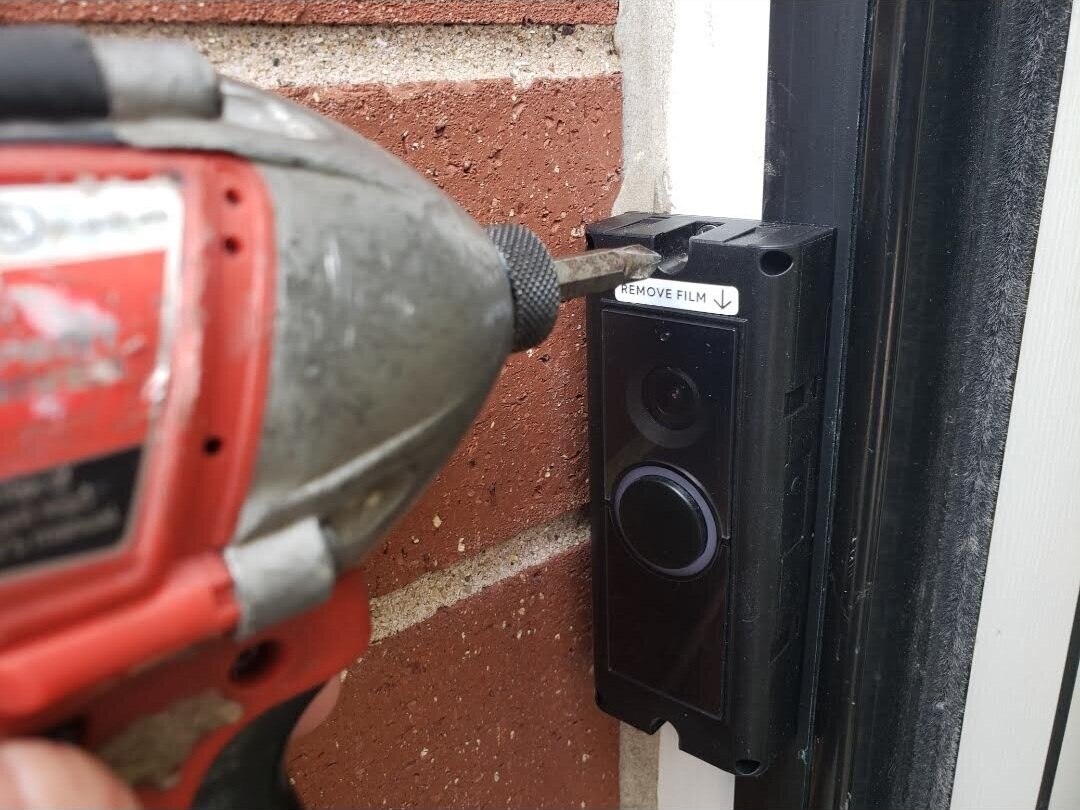
Screw in the two screws that hold the Ring Pro Doorbell on the wall.
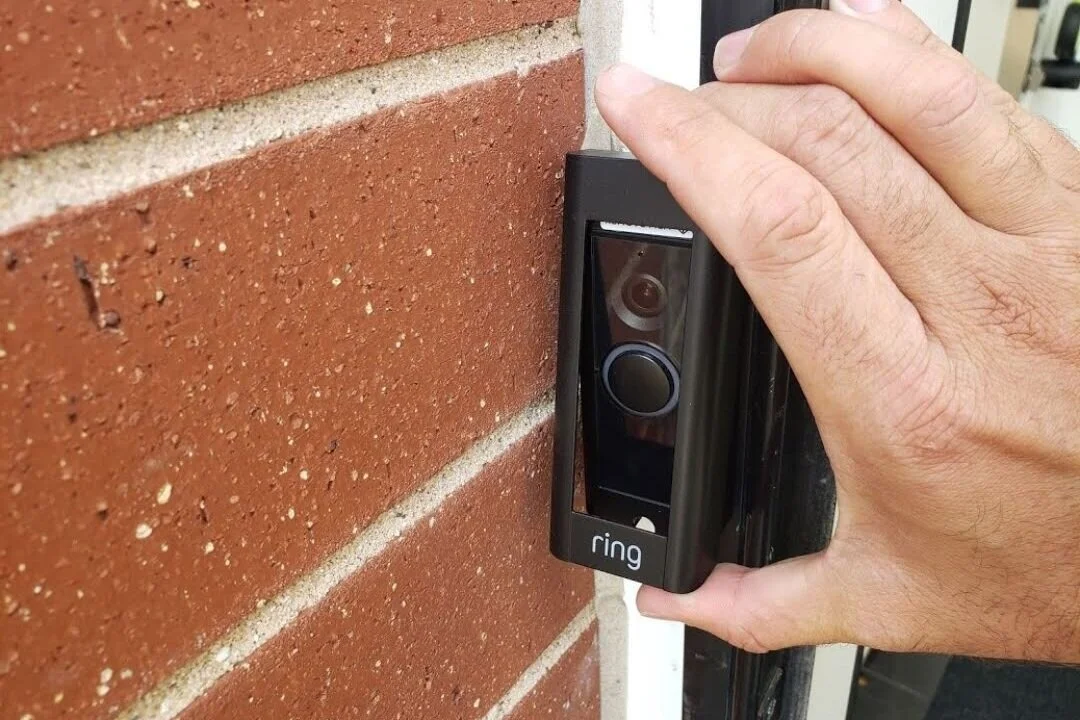
Step #7 Leave the cover plate installed for now incase you need to reset the doorbell or wake it up using the reset button mounted on the side. In the picture above you can see that the Ring Pro reset button is on the right side of the doorbell. Behind where the cover is typically located and inline with the doorbell button.
Step #8 Go to your doorbell chime and remove the doorbell chime cover. Take a picture of the existing wiring and mark which wires are going where with electrical tape if needed.
Step #9 Remove the Ring Pro Power Kit from the box. After you’ve taken a picture of your existing wiring remove the wires from your doorbell chime terminals. Install the black wire from the ring pro power kit on to the “Front” terminal of the doorbell chime. Wire the white wire from the Ring Pro Power Kit to the “Trans” or “Transformer” terminal on the doorbell chime.

Take a picture of your existing wiring before installing the Ring Chime Power Kit. The black wires goes to the front door terminal and the white wire goes to the transformer terminal. Attach the wire terminations to the longer free ends of the wires as shown in this picture. In my case the larger red wire was the front door wire and the smaller red wire was the transformer wire. Most people have red or white wires for their doorbell wires but this is why it’s important to take a picture of the existing wiring before you start installation.
Step #10 Now with the extended wire on from the Ring Pro Power Kit use the included wire connectors and wire the wire labeled Trans to the old wire that your removed from the trans terminal and use the wire labeled front door and wire it to the wire you removed from the “Front” or “Front Door Terminal”
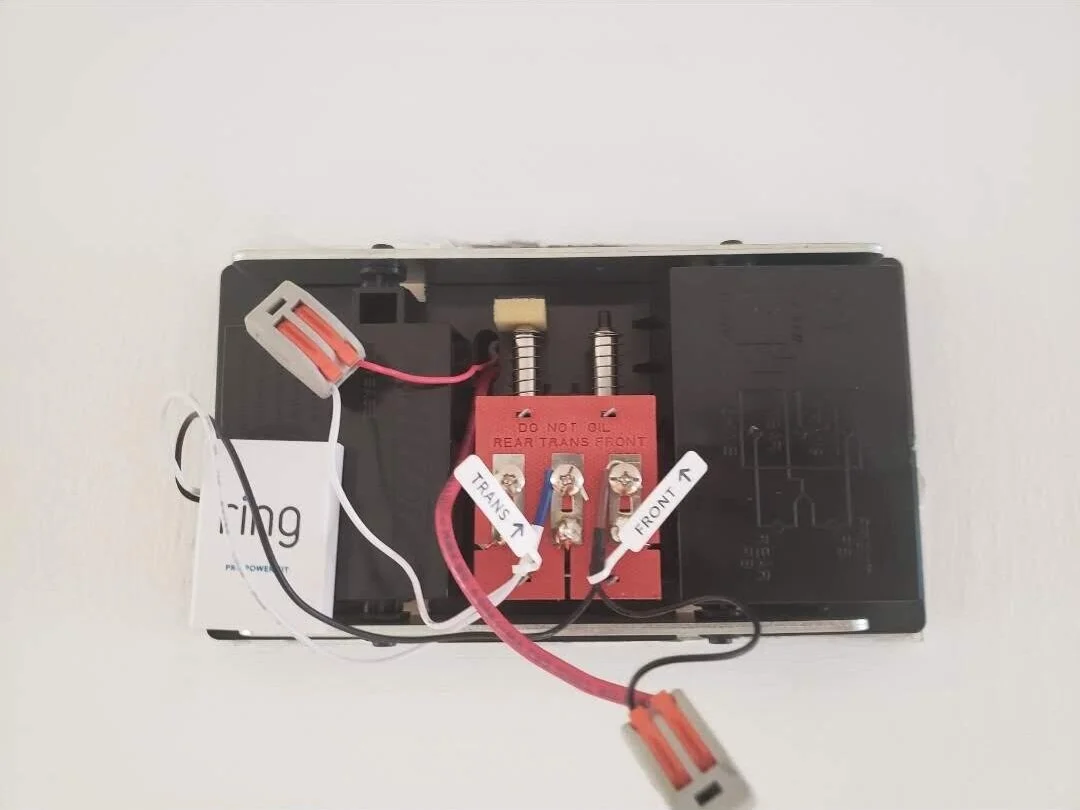
Attach your existing doorbell wires into the wire terminations. The front door wire should go to the front door terminal wire and the transformer wire should go to the transformer terminal wire.
Step #11 Mount the Ring Power kit inside the doorbell chime box. It has adhesive on it so you can do so.
Step #12 Replace the doorbell chime cover.
Step #13 Turn the power back on to your doorbell chime at your electrical panel.
Step #14 Get your phone open the Ring App. Click on the menu in the upper left hand side of the app. Open the app and click on the “Set up a device option.” Choose “Doorbells”

Ring Pro Doorbell App Setup. Click on the menu in the upper left hand corner.

Ring Doorbell Pro Installation: App Setup-Click on the “+ Setup a device tab”

Select the “Doorbells” menu option.
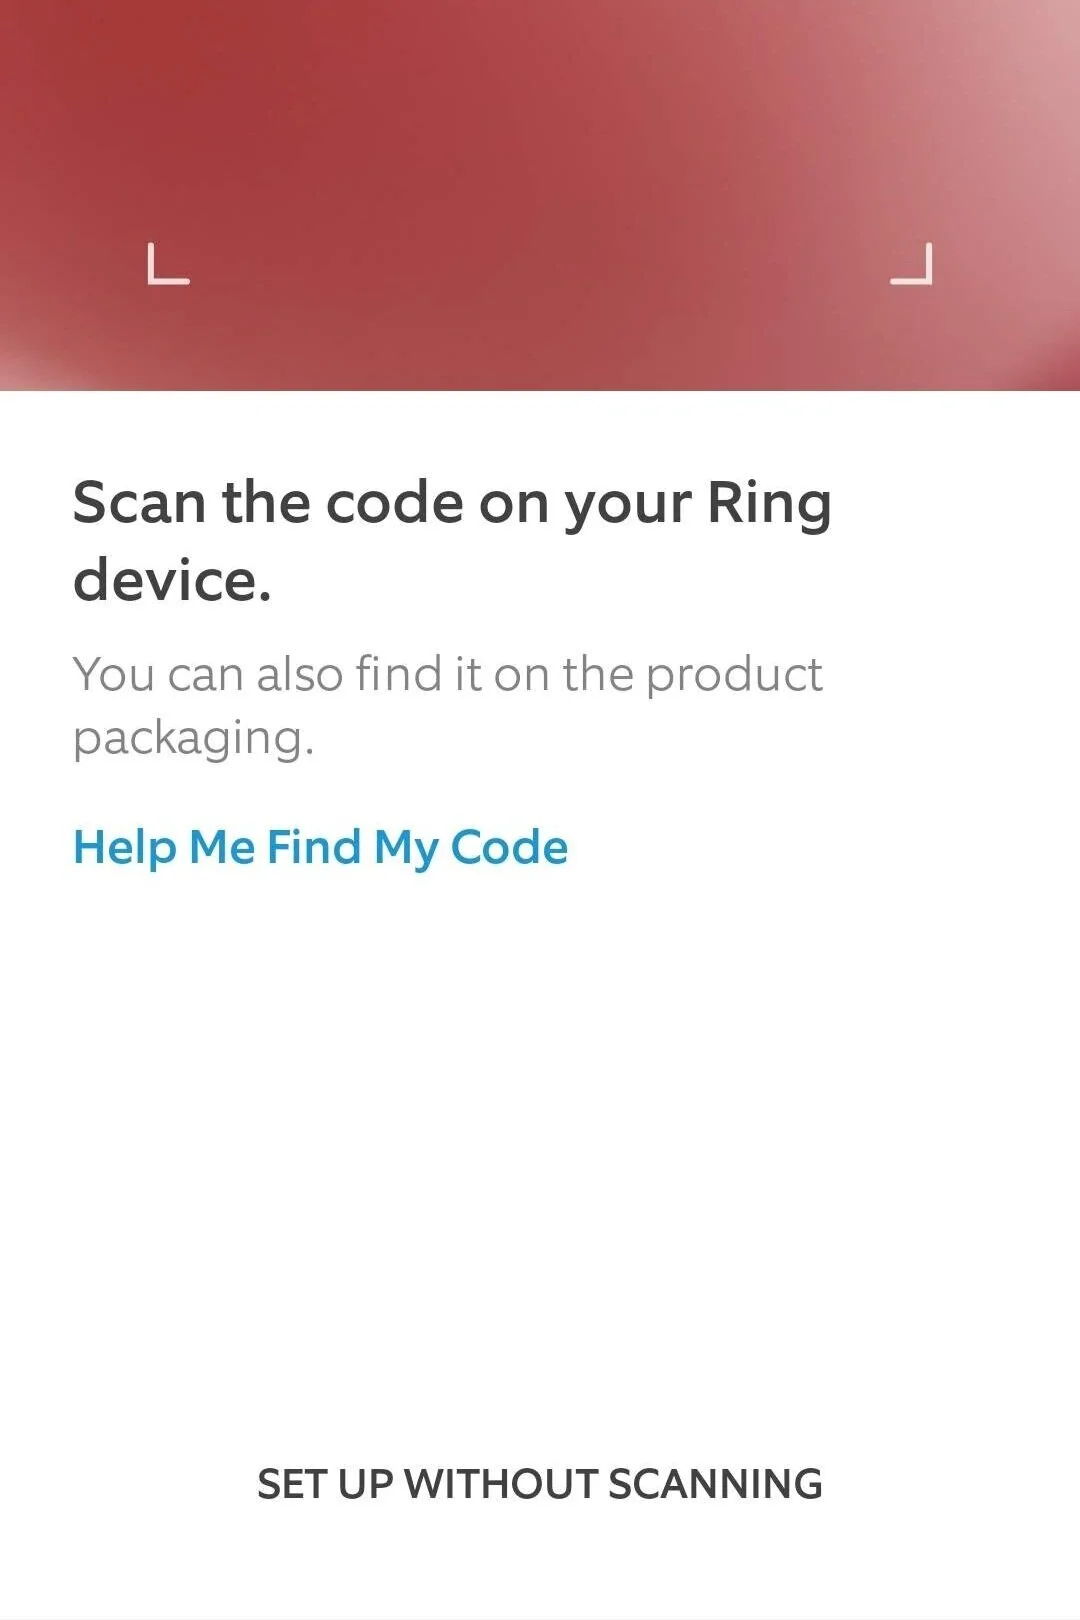
Step #15 Scan the code on your Ring Pro Doorbell or Ring Pro Packaging to continue with setup. If you can’t find it click “Continue Without Scanning”
Step #16 Since you’ve already installed the doorbell you can click on doorbell already installed when asked by the app. It will most likely ask you to name the doorbell and confirm the location you are installing your Ring Pro Doorbell at.
Step #17 Once confirmed it will ask you to choose what type of chime you have. Most people have mechanical chimes. The chime in the instructions above are mechanical chimes. If you want to determine what type of chime you have you can learn more about doorbell chimes here.

Ring Doorbell Pro Chime Installation
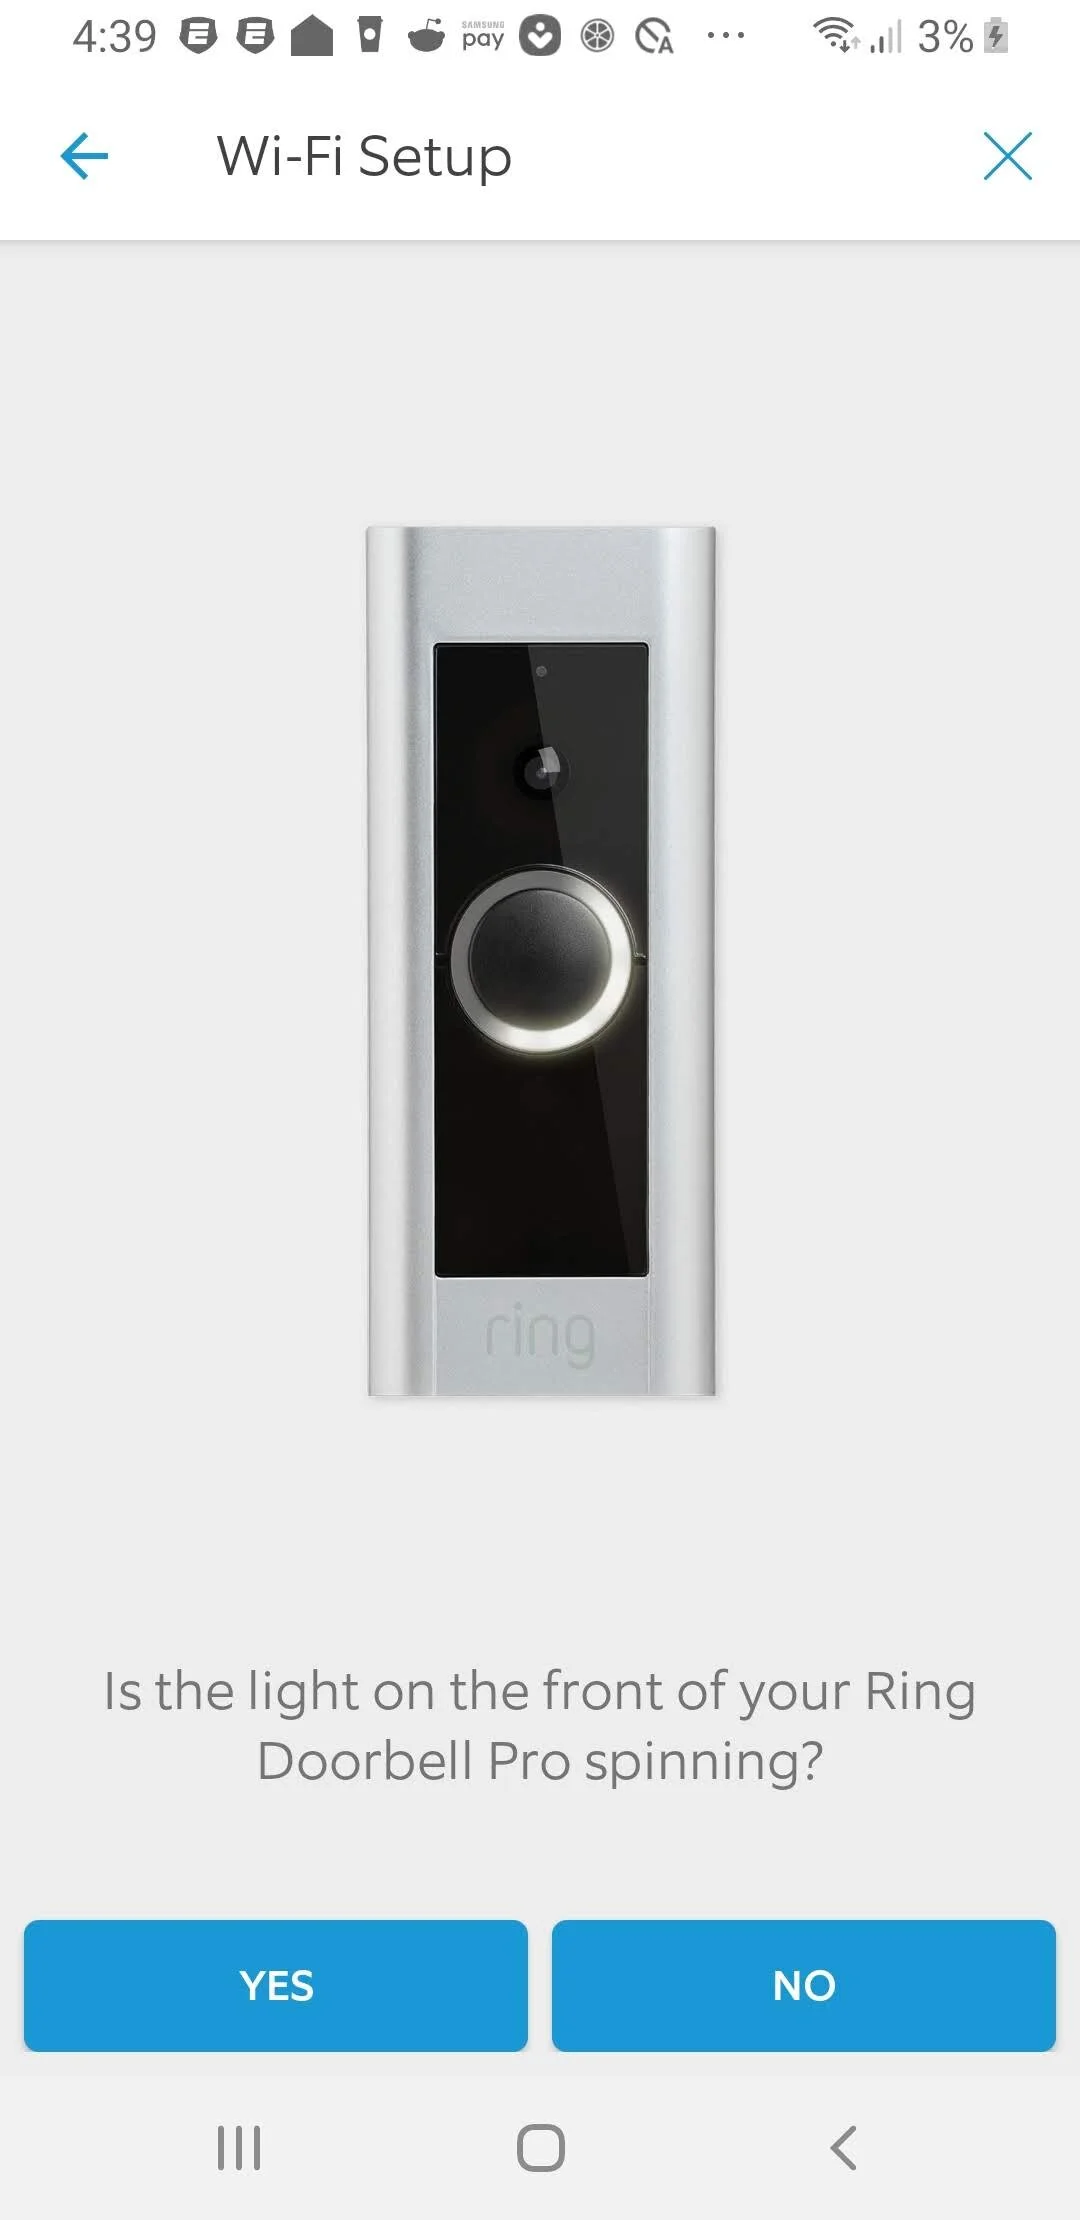
Step #18 It will then ask and start connecting your doorbell to your wifi network. Confirm the light is spinning on the Ring Doorbell Pro and enter your wifi information as needed. With the doorbell setup and connected you can now choose the cove plate that best matches your Ring Doorbell Pro and install it.
Ring Doorbell Pro Wifi Setup
Last step: Install Ring Doorbell Pro Cover Plate
Congratulations you have successfully completed your Ring Doorbell Pro Installation. If you have any problems you can continue below for Ring Pro Troubleshooting and Solutions to Ring Doorbell Pro Installation Problems.
Ring Doorbell Pro Installation: Summary
Setting up the Ring Doorbell Pro is easy if you have existing wiring and enough power from your doorbell transformer. It takes about 15-30 minutes to install a Ring Doorbell Pro and then you’ll be capturing live video from your front door. If you don’t have enough voltage at your front door you can use the Ring 2 Doorbell which only requires 10V of power but can also be used entirely with rechargeable battery power if you prefer.
The Ring Doorbell Pro has a subscription that will save 30 days worth of video footage for $3 per month. If you get a Ring Alarm System and get the professional monitoring subscription for $10 a month it automatically includes free video storage for any of your Ring Doorbells or Ring Cameras so you don’t need to pay for the additional doorbell video subscription.
To increase the functionality of your Ring Doorbell you can also connect it to an Echo Show 5 to live stream video on your Echo Show or you can combine it with a Ring Chime which can also alert you when motion is detected at your front door with a melody. The Ring Chime can also be used as a remote chime.
If you’ve had any trouble installing your Ring Doorbell Pro we’ve included a Ring Pro troubleshooting guide below for your use and instructions on how to connect your Ring Pro to Alexa.
Ring Doorbell Pro Installation Problems
We cover the most common Ring Doorbell Pro installation problems and Ring Pro Troubleshooting in this section. Typically it’s easy to fix the problem and you can have your Ring Doorbell Pro up and running in no time.
Ring Doorbell Won’t Turn On
This typically means that your doorbell doesn’t have enough power. There are two parts to this, if your doorbell has been in the box a long time it might need to charge up for a few hours. This happened with my Ring Doorbell. I let it charge for 2 hours and then it started working fine.
Or your Ring Doorbell not getting enough power from your doorbell transformer in which case you will need to install a new more powerful transformer this 16V-30VA transformer is what I have tested recommend. It’s also a good idea to perform a hard reset on the device to attempt to wake it up. You do this by taking of the cover plate, and holding the reset button on the side of the Ring Pro Doorbell for 30 seconds.
These two resources below should help you with troubleshooting why your Ring Doorbell Pro won’t turn on.
Doorbell Wiring Troubleshooting
What Transformer To Use For Ring Pro
Where Is My Doorbell Transformer
Doorbell Chime Won’t Ring
If your Ring Doorbell Chime won’t ring it could be one of several issues. Your doorbell chime could be broken, or your doorbell chime is not compatible. If your Ring Doorbell is not working you can always just use a wireless Ring Chime as a doorbell chime instead of a hardwired chime. If you want to troubleshoot your doorbell chime we’ve included the following resources below which should help you.
List of Chimes That Work With Ring Pro
Doorbell Wiring Troubleshooting
Ring Doorbell Wireless Chime Review
Ring Doorbell Pro Won’t Connect To Wifi
If you Ring Doorbell Pro won’t connect to wifi there are a couple things you can do. The first thing I would try is resetting your Ring Pro Doorbell by pressing the reset button on the side of the doorbell under the cover and performing a hard reset and holding the button for 30 seconds.
Then go through the in app setup process. If that doesn’t work it might be time for a new wifi router system. I typically recommend using a mesh wifi system like the Google Wifi or Eero Router System so that you can add additional mesh wifi points to strengthen the signal if needed.
I personally have an Eero Mesh Wifi system in my house but have used and tested the Google Wifi system and it also works great for smart home devices. I choose Eero because I like the thin profile of the additional router access points that can plug directly into the wall and are unobtrusive.
Ring Pro Installation Without Doorbell
You can install the Ring Pro without a doorbell. If you plan on doing this all you need to do is make sure that you have a sufficient 16V power source that will provide power to the Ring Pro Doorbell. You wire it into the back of the doorbell and then turn the power back on. I recommend using a plug in transformer if you plan on wiring a Ring Pro without a doorbell. What’s great about the Ring Doorbell Pro installation is that you can use a wireless Ring Doorbell chime paired with the Ring Pro and it will function similar to a hardwired doorbell.
How To Connect Ring Pro To Alexa
You can also connect Ring Pro To Alexa in a few simple steps. Connecting Ring Pro to Alexa allows you to view the live video stream from your Ring Doorbell on your Alexa device with a screen like the Echo Show 5 or Echo Show. You can even view your Ring Pro live video feed on your TV if you have Fire TV Stick or Fire TV Cube.
We have a full in depth guide you can follow in another post for how to connect your Ring Doorbell Pro to Alexa or you can follow the steps below.
1. Install the Ring Pro and complete the set up through the Ring app.
2. Open the Amazon Alexa app on your phone.
3. Click the menu on the top left of the screen.
4. The menu will have several different options. Click on the "skills" tab in the menu.
5. This will take to you the Alexa skills store, Alexa skills are like "apps" for your Amazon Alexa devices. At the top of the screen there is a search bar. Enter "Ring" into the search bar. Two "Skills" will pop up.
6. Select the "Ring" Skill.
7. Click Enable.
8. Enter your Ring account username and password.
9. Once you do that the skill is linked to the Ring Pro. Alexa will then ask you to discover devices, just click yes. If Alexa does not ask you to discover devices go back to the main Amazon Alexa home screen. Click on the menu at the upper left and click on "Smart Home" within the menu.
10. Once in the smart home menu click on the "+ Add Device" button if you don't see your doorbell listed in the devices. The doorbell shows up as a camera logo which looks like a circle with one leg. If you don't see your camera already in the smart home devices click the "+ Add Device" button. If you already have the ring pro doorbell added and it shows up in the smart home devices its already connected to your Amazon Alexa Show or Spot.


